If you have an office network or a home network, you might be willing to use a proxy server to cache and speed up your Internet surfing. More you have machines connected on your network, more likely it is that you will request multiple time the same files (Just imagine how often the Doodle from Google is uploaded on a network with 10 machines on it). A proxy is also a good way to add restriction allowing you to prevent your users to go to undesirable websites or to use unsafe protocols. It can also allow you to request a user authentication before being allowed to access the Internet. Or, it can also allow you to channel all traffic through a privacy protection service like TOR.
Whatever is your reason, if you have a Synology server, setting up a proxy server becomes much easier these days.
There is two parts in setting up a proxy:
1° Install the server
2° Ensure the users will use the proxy.
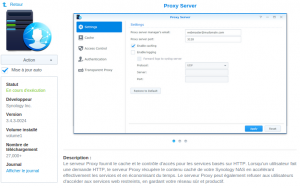
For the first part, on a synology, it is now really easy. Go to The Packet Center, click on Utilities and select Proxy Server (from Synology inc.). Click on Install, that’s it.
You will have to configure it: Just provide your email address if you want your user to be able to contact you should they have a problem and set the port address on which the server will listen. You can use 8080 but any not used port will do it. Noticed that it is likely that port 80, 443, 5000 and 5001 will be already taken. Usually, we advise not to use port numbers between 1 and 1024 as they are already reserved and assigned to specific services. Above 2048 is even safer. 8080 is quite common for web services or proxy servers. Activate the cache and the connection, check “Activate Automatic Proxy Discovery” in proxy deployment and leave the other parameters by default.
That’s it, your proxy is up and running. Congratulation!
Now you have to tell your computer to use this proxy to navigate in HTTP or HTTPS.
Hopefully, you clicked on activate automatic proxy discovery and it will help.
The first possibility, if you have a standalone computer, is to go to the network settings (it can be through your Internet Explorer or Chrome settings) and set Use a proxy.
To make it easier, you can configure your DNS and/or your DHCP to provide automatically the proxy setting to your client computers using a PAC file (Proxy Automatic Configuration). When clicking on the proxy distribution address, this file was automatically generated and configured for you on your synology.
For the DHCP, you must add the DHCP option 252 (text or String) with the url to the wpad.dat file (example: http://192.168.1.254/wpad.dat)
For the DNS, its even easier, the webserver on which you have placed the wpad.dat file (in the root folder of the server), likely your Synology server, must be know by the allias wpad.your_network.com (where you replace your_network.com by the domain name of your network as define in the DNS server). When configured on Automatic Proxy Configuration, browsers will look for a set of possible variant of http://wpad.my_network.com/wpad.dat. When the file is found, it is used by the browser to configure how it access the Internet using a proxy.
Be sure your computers are set on Automatic Discovery of Proxy settings (in network settings).
Sometimes, the default wpad.dat file generate by Synology will not work perfectly as it might try to use the proxy to access computers on your own network. You can edit the file using an editor (the file is located in the root folder of your web server on the synology) and type something like this:
function FindProxyForURL(url, host) {
if (isInNet(host, "192.168.1.0", "255.255.255.0"))
{  return "DIRECT";  }
else
{  return "PROXY 192.168.1.254:8080" ;  }
}
In that example, 192.168.1.0 is the network address of the local network. 192.168.1.254 is the IP address of the Synology and 8080 the port defined for the proxy server.
Be really careful with wpad.dat file, it is extremely sensitive to misplaced whitespace or the absence of trailing “;”.
That’s all folks!
Have fun!

You must be logged in to post a comment.